


Changes in EditorTutorialRemainingStuff
Editor Comment
Navigation table
Revision Differences of Revision 5
## Tutorial to the Widelands' Map Editor ¶*< back to EditorHelpTutorial* 
### What Remains to be Done 
We have completed the landscape and placed all goods, now for the final steps: 
#### Set the Starting Points 
We have to determine how many tribes may play on this map and set their starting points. 
Image | Description 
----- | ------- 
 | For that, open the Players Menu (sixth button at the screen's bottom). 
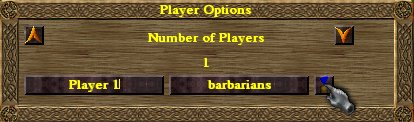
Add more players by clicking at the arrow up. Rename them if you wish, choose which kind of tribe they shall be on default or if the map is played as a scenario (Barbarians, Atlanteans, Empire) and ultimately, click onto the sign with the player's colour to place the Starting Point. Starting Points may only be placed on green spots (large buildings) and in a minimum distance to each other. 
#### Triggered Events 
If you want to create a scenario with some special conditions, you may use Triggers and Events in order to do so. 
Image | Description 
----- | ------- 
 | We want to make an Event that greets the player after half a minute gaming time (hey, never wrong to be polite!). For that, we first need to create the Trigger that activates the Event after half a minute. Open the Event Menu (seventh button at the bottom) and click the 'New Trigger'-button. 
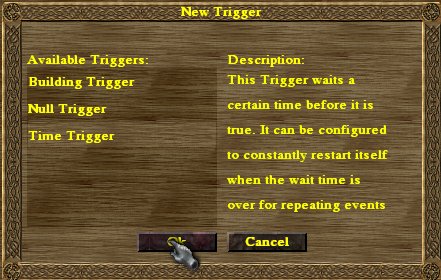 | As the description, which appears whenever you click a Trigger, tells us, the Trigger we are looking for is the Time Trigger. So we create a 
new Time Trigger by double-clicking it. 
 | This opens the Trigger Options. Firstly, you can rename your Trigger here. Since you might use several Triggers of the same kind sometimes, always try to give them significant names to distinguish them. We do not want the Player to be greeted every 30 Seconds but only once, so we leave 'Only triggers once checked'. Finally, we want the Trigger to be set after 30 seconds, so that's the value choose. After clicking OK, the Trigger is complete and added to the Registered Triggers list. 
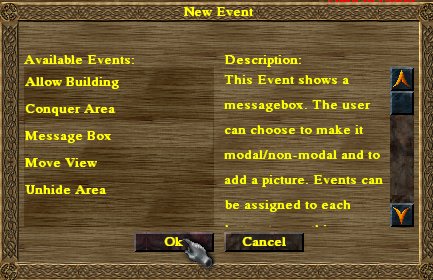 | Now that we have a Trigger, we can move on to the Event itself. Click the 'New Event'-button. Same as before, we have a list of Events to choose from and a description of the Event we click on. The Event we need is Message Box. 
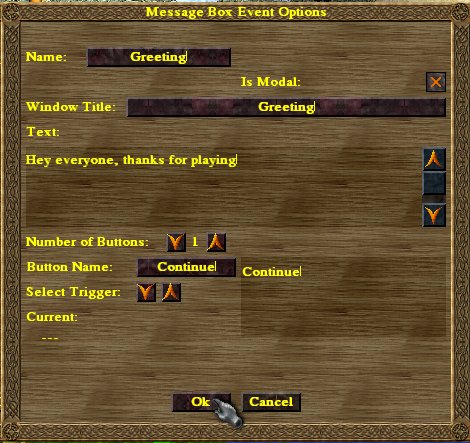 | We set the Event options; in this case, we need to rename the Event properly and to type the text the Message Box is supposed to display our greeting. 
 | We need to choose finally which Trigger shall activate the Event. For this open the Eventchain-menu. On the right side we have all Triggers we created - only the 'Time to Greet'-Trigger in that case - and on the left the Triggers we have already assigned for that Event (none in the beginning). We choose the 
'Time to Greet'-Trigger and click at the arrow pointing to the left to assign the Trigger to our Event. 
 | Now, if we click on OK, a similiar window opens, asking us, which event should be triggered. We select our event and click again on the arrow. Above the choosen event(s) is a button where we can choose whether the Event shall be retriggered when the Trigger is set (in this case, after 30 seconds have passed) or unset (have not passed yet). If we had created several Triggers we might assign them all; in that case, the Event would only be triggered if all Triggers-to-be-set were set and all Triggers-not-to-be-set were not. After we click OK the Event is added to the Registered Eventchain List - we are done. 
#### Map Options 
In the [Editor's Main Menu](../EditorHelpMainMenu) there is a button labelled 'Map Options', leading to a likewise named menu. 
Image | Description 
----- | ------- 
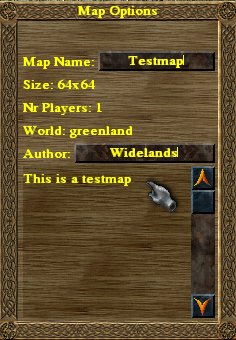 | Here you can give the map its name, which will be displayed in the game while choosing the map, the author's name (yep, yours) and a comment (usually to describe the map). 
After you're done with this, lean back... you've completed both your map and this tutorial! Enjoy playing and creating! 
- | - | -------------------------------- | - | - 
[Editor Help](../EditorHelpHelp) | ~ | [Creating a map](../EditorTutorial