


Changes in EditorHelpToolMenu
Editor Comment
cleanup
Revision Differences of Revision 8
## Tool Menu ¶#### Contents 
[TOC] 
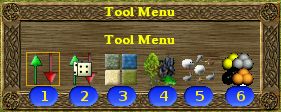
The Tool Menu is the core of the editor and allows you to modify the terrain and place resources. You obtain it by clicking onto the second button at the screen's bottom edge or by pressing the hotkey T. It consists of 6 buttons: 
Clicking on any one of those selects the corresponding tool and shows/hides this tool's option menu. The mouse cursor changes appropriately to display the selected tool. You use a tool by clicking onto the map at the spot you want to manipulate (and holding the mouse button for continuous use of the tool). The ((Editor Help Toolsize Menu|Toolsize Menu)) allows you to adjust the area you want to modify at once. Some tools have alternative functions which you obtain by holding SHIFT or ALT respectively while using the tool. 
The tools are: 
### Height Tool 
A Widelands landscape is threedimensional, with every field having a certain height level (the default height being 10 - on a newly created map all fields will be on height level 10). The Height Tool allows you to modify height levels in order to create mountains, hills, valleys and canyons to make the map more realistic and/or interesting; besides the flatness of the landscape also influences gameplay determining how slow/fast the carriers move on the roads and which buildings can be built at which spots. Its options are In/Decrease Value and Set Value. Using the Height Tool with no keys pressed results in increasing the height value of the field you clicked at (or which are within the toolsize-radius) by the value next to the In/Decrease option (the default value is 1). Alike, using it with SHIFT pressed results in decreasing the height level by the same value, which is indicated by the cursor changing from a green arrow upwards to a red arrow downwards. Holding ALT while using this tool finally results in the height level changing instantly to the value next to the Set Value option, independantly on the height level the terrain had before. Keep in mind that a mountain flank can have only a limited steepness in Widelands. Therefore if you increase (decrease) the height of one and the same spot several times sooner or later the surrounding fields will have to be elevated/lowered as well. Hence, if you increase the height level of a field and then decrease it instantly again it is not certain you will have returned to the situation you had to begin with. 
### Noise Height Tool 
With the Height Tool you can easily create high mountains or deep valleys, or manipulate the flatness of a particular spot as you want to. However, you will probably often not have any particular formations in mind, but rather a randomly generated plane with hills - for an all-flat plane looks boring indeed. For this purpose you have the Noise Height Tool, which has the following options: Minimum, Maximum, and Set Value. If you do not hold any keys while using this tool it sets the height level of the affected fields onto a value ranging from Minimum to Maximum. Hence, a difference of 1 or 2 between Minimum and Maximum will result in a plane, which is not boringly-flat-looking anymore, but still flat enough to allow a lot of large buildings, while a difference of 3 through 5 will create hills with progressively more spots too uneven for more than small buildings. Even bigger differences result in a lot of high hills where not many buildings can be built at all. Holding either SHIFT or ALT utilises the Set Value option, which is identical to the Set Value option of the Height Tool. 
### Terrain Tool 
A newly created map consists only of steppe (for a map created using the 'greenland' terrain set; for a different world it would differ), You probably will want to use other kinds of terrain: mountains, where mines can be constructed, water, grasslands and whatever else you think might add to the appearance of your map. You do so by selecting the Terrain Tool and choosing the terrain you want to set. The kind of terrain influences which - or whether at all - buildings can be built at a certain spot and which default ressources are present there. 
### Immovable Bobs Tool 
With this tool you can furtherly spice up your map by placing such objects as dead trees, flowers, grass bushes, mushrooms, monoliths and the like. You also employ it to place trees to be chopped down for wood and granit rocks for building stone. By clicking onto the green dots you can switch between all the bobs available. Similarly to the Terrain Tool, you can hold CTRL while selecting Bobs to select several ones, from which the ones you place will be selected randomly. This is particularly useful in order to create a forest consisting of mixed trees. By pressing SHIFT or ALT you switch from placing Bobs to removing them. 
### Bobs Tool 
Using this tool you can populate your map with rabbits and similar critters (which can be hunted down in game). Again, you can hold CTRL to select several Bobs from which the placed one will be chosen randomly, and hold SHIFT or ALT to remove Bobs. 
### Resources Tool 
While some kinds of terrain hold default resources automatically (like some amount of water being present in any grassland or some fish in any water puddle - to make an example employing the 'greenland'-set), you might want to replace these automatic values with others or place resources not available otherwise. You do so with the Resources Tool, which has the options In/Decrease Value and Set Value. These options are used exactly in the same way as for the Height Tool. Note that resources can be placed only on the proper terrain - you cannot place gold into a swamp, solely onto mountains. However, as of the time this document is being written (build-8), if you place resources first and modify the terrain afterwards, the resources will "not" be adjusted again and will remain. You will not be able to remove them then, since the terrain will not be right for modifying that kind of resource - you will have to restore the proper terrain first. This is a known bug and should be removed in future. You can check the resources of a field by pressing I and clicking onto the field; note however, that the default resources will "not" be displayed. In other words, only resources on fields you have modified with the Resources Tool will be displayed correctly. 
##
* [Editor
* [Editor H
* [
[Toolsiz
[Pl